Wednesday, March 31, 2010

Egg-cellent Homemade Dye


Yeah, I couldn't help myself. The cheesy, made-up 'egg' word was unavoidable. Anyway... 

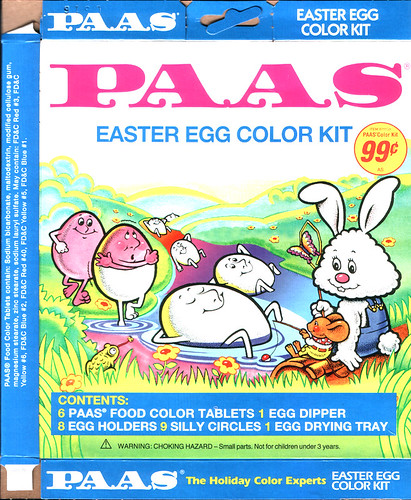
Today, the grandkids dyed Easter eggs with Grandma as part of her annual Easter party (complete with egg hunts and Easter baskets).  Unfortunately, Grandpa and the dads missed out on the fun -- all of them were busy at work. That said, it was a fun day. For the kids, dyeing eggs was pure, messy fun. But now we do one thing differently when it comes to dyeing eggs than we did back when I was a kid: we've ditched the store-bought Easter egg decorating kits.  Sure, the kits (complete with dye tablets, egg dippers, and drying trays) are fairly inexpensive, BUT it's still an unnecessary expense.  You probably have everything you need in your kitchen cupboard right now.


There are two ways to make your own Easter egg dye.  There are natural dyes you can create by using colorful foods and teas. For example, for yellow eggs you can use ground turmeric or chamomile tea; for pink/red you can use beets; for blue, use blueberries.  Out of sheer curiosity, my mom and I tried dyeing eggs with foods. It worked, but you definitely don't get the vibrant colors you do with artificial food coloring. But, it does have a fun, earthy element to it - made me feel like a pioneer - so if you're interested, it's a fun experiment.  Check out this great post about natural egg dyes from Simple Organic for more in-depth instruction. 

I use artificial food coloring for my Easter egg dye.  The Simple Organic post advocated using natural dyes as a "safe and healthy" alternative. I try to avoid giving my family food with artificial coloring, but I figure it's not a big deal since we don't eat them. I mean, hard-boiled eggs displayed at room temperature for days probably shouldn't be eaten. For that reason, I have no qualms about using the fake coloring.

To make your Easter egg dye, all you need is vinegar, food coloring, and boiling water. Add 1 tsp.  vinegar and 20 drops of the desired color to 1/2 cup of boiling water. Dip your hard-cooked egg as long as you want, to get the color you want.  That's it!

Like I said, the egg dyeing kits don't cost that much, but this homemade dye is dirt-cheap and takes hardly any time to make.  Plus, the other things in the kit are pretty superfluous. An egg drying tray?  Use the empty egg carton.  Egg dipper?  A spoon works just fine.  And the little stickers and egg rings?  Let the kids go at the eggs with a white crayon - it's a lot more fun that way.  

One other thrifty little tidbit: Once you've boiled your eggs for dyeing, keep the water!  Sounds crazy, I know, but it makes great houseplant food. Make sure there aren't any pieces of egg (sometimes they crack) in the water. This water is great for houseplants because it contains lots of minerals from the shells of the eggs.  Just thought I'd mention it.

Monday, March 29, 2010

Container Gardening 101 - and Planting Peas

Last year, I grew some of my vegetables in pots for the first time.  For the last few years, I'd gardened exclusively in my square foot garden out in the yard.  However, my tomatoes never flourished the way I wanted them to in the square foot garden. I'm not entirely sure why this was - maybe the soil wasn't great for tomatoes, or there was too much water, or not enough sun. In any case, I was determined to have homegrown tomatoes (there are few things more delicious than a homegrown tomato, in my humble opinion).  So I took a container gardening class.  Let me tell you - container gardening was a huge success for me.  Not only did I get a ton of beautiful, delicious tomatoes, I also got a great crop of peas, basil, and tomatillos.  I'm converted. Yes, I still use my other garden for carrots, spinach, lettuce, pumpkins, and other veggies, but I love container gardening.

One of the best things about container gardening (besides the yummy homegrown produce) is that just about anyone can do it, no matter where you live. If you've got a little space outside - a balcony, a patio - that gets a good amount of sun, you can have homegrown vegetables. For those who have a yard but are intimidated by the prospect of having a garden, container gardening is a great way to get started.  And let me tell you, there's something incredibly satisfying about growing your own food.

Here's some of the basics when it comes to starting a container garden (these tips come from the hand-out from the class I went to last year):

Before You Get Started
  • Keep in mind that vegetables need 6-8 hours of sunlight. If you place your pots facing south, you'll get the best results.
  • You need to have a water source close at hand. Your vegetables will need to be watered just about every day, especially in the summertime.
  • Know your area's average last frost date in the spring (in my area, it's Mother's Day) and the average first frost date in the fall (Halloween where I live). You can find these dates online if you know what zone you live in (click here to find out your zone). This will help you decide what to grow and when. 
What Containers to Use
  • This all depends on what you want and can afford.  Some people prefer plastic pots - they're not heavy or expensive.  The woman who taught the class I went to said not to use ceramic or clay pots because she says they're too heavy and too expensive. As you can see in the picture above, I used terracotta pots anyway.  BUT, I got an awesome deal on my pots - they're only $5.99 at IKEA.
  • Be sure that whatever pot you pick, plastic or terracotta, that you choose one with drainage holes.  Very important.
  • Use the largest containers you can find. The ones I use are 14" pots. One gallon pots will not work.
What (and What Not) To Plant in Containers
  •  Vegetables that work best in pots are: 
    • Lettuce
    • Tomatoes
    • Peppers
    • Spinach
    • Eggplant
    • Potatoes
    • Peas
    • Cucumbers 
  • Vegetables that don't work well in pots:
    • zucchini
    • summer squash
    • kale
    • Swiss chard
    • red beets
    • carrots (not enough space)
 Right now, in most areas, it's too early to plant tender crops like peppers and tomatoes. But late March and early April is the perfect time to start growing your leafy vegetables and peas.  Peas are really easy to grow and have a great yield, which is why I think growing them is a great way to get started on container gardening.  Really, you should give this a try. You'll be so proud of yourself, I promise.  Here's the process...

This year, I'm planting two varieties of peas: Lincoln and sugar snap. You want to choose pea seeds with a short maturation period.  Before I planted them, I let them soak for a while in some water (yet another reuse for the yogurt cups). I didn't soak mine for very long; my mom always soaks her seeds overnight.  This isn't a required step, but it can't hurt.  One note: if you're going to plant peas, be sure to do it early.  Peas planted after the end of April will be hard and tasteless because of the heat.

Fill your pots with potting soil (purchased in bags).  Do not use garden soil (which also comes in bags) or soil from your yard. I can't remember exactly why the teacher of the class I went to said this so emphatically, but I'll take her word for it. Make sure that the potting soil you buy can be used for vegetables (it'll say on the bag). Anyway, I also mixed in a few inches of organic matter (aka compost - you can also buy this in bags at your local nursery).


To plant your peas, space the seeds about an inch apart around the edge of the pot. I go around the pot with my finger and make a bunch of holes that are about an inch deep (to your first knuckle).  Once I've made the holes around the edge, I also do another circle of them in the center of the pot.  Put one seed in each hole and then smooth the soil over them, patting down gently. Note: if you want to plant other seeds in other pots, just follow the directions on the seed packets. There's no special technique for planting seeds in pots as opposed to planting seeds in a traditional garden.


Add a tomato cage - the pea plants will need something to climb.


Then just add water.  You want to water your pot thoroughly after planting.  Keep the soil moist but avoid overwatering during maturation (when you have actual pods on the vines).  I water my pots just about everyday - sometimes twice a day during the really hot months of July and August.  Pots dry out quickly, so it's really convenient, as mentioned previously, to have a water source close by.

Homegrown peas are delicious and if you grow them yourself, you will, most likely, get a good crop of them. As much as we love peas here, last year we had more than we could eat all at once. If this happens, just blanch and freeze them (how-to is here).  You can plant another crop of peas in early August for a fall crop, too.

One other thing I want to address:  Sometimes I've wondered to myself (last year particularly), "Is this gardening really frugal?" I mean, after buying a bunch of pots, several tomato cages, all the potting soil, and the seeds, wouldn't it be cheaper to just buy a bag of frozen peas at the store?  Yes and no.  That first gardening season, yes it probably would be cheaper. But, the next year, once you've got all your pots and supplies, all you need is the soil and the seeds. This year, I spent about $10 on potting soil to fill four of my pots for peas; some of the seeds are from last year and the new sugar snap ones only cost about a dollar.  So, there is a bit of an investment that first year of container gardening, but every year after that, it pays for itself. Plus, when you taste the peas and tomatoes that you grew, you'll be hard-pressed to go back to the supermarket ones.


Next post:  How to dye Easter eggs frugally and naturally!

Tuesday, March 23, 2010

The Grass is Always Greener: How to Grow Living Easter Grass

Sorry about the second week-long hiatus. I was sick last week - really sick. I could barely talk, eat, or sleep.  But, I'm feeling all better and my brain is working again. Unfortunately, I'm behind on everything - this blog (and my others) included. Oh well, gotta start somewhere...

Can you believe it's already the second half of March? Even more unbelievable, in just under two weeks it will be Easter again. Where does the time go? In any case, a couple days ago, my mom and I were talking about growing grass for our Easter baskets again.  I thought writing about how we did it would be a nice way to finally welcome spring!

We grew it as an experiment a couple years ago and it worked out great. It's really cheap to grow your own Easter grass. Even better, it's so easy to do! Plus, that plastic grass doesn't look that good and it gets everywhere.  Seriously, I'll be finding random strings of the plastic stuff around the house in May. Anyway, there are lots of ways to grow wheat-grass, but here's how I did it:

What You Need
  • Hard, uncooked wheat. The amount you'll need depends on how much grass you want to grow.  But since wheat is fairly inexpensive, you can buy a pound inexpensively and easily have enough. I bought my wheat for this project in the bulk section at our local health food store. 
  • Aluminum foil
  • Vermiculite - you can find this at a nursery. Though I haven't tried it, I'm pretty sure could use potting soil, instead.
  • A basket  (you could also use any container or pot, if you prefer)
  • A spray bottle

 What To Do
  • Line the bottom of the basket with aluminum foil.  Spread a layer of wheat on the foil - this will give you an idea of how much wheat you'll need to soak. 
  • Once you've measured the wheat you need, transfer it to a container/bowl/jar and cover it in water. Let it soak for at least 12 hours or so. I wouldn't recommend much longer than that though. 
  • After the wheat has had a good soaking, get your basket ready. On top of the foil, lay a few inches of vermiculite (or potting soil).  
  • Spread the wet wheat on top of the vermiculite/potting spoil.  Press it in gently.
  • Cover with a dishtowel and place the basket in a warm, sunny place.  Be sure that the wheat stays moist - not soaking, but moist.  This is where the spray bottle comes in handy.
  • Once the wheat has sprouted, keep it uncovered. Let it grow in said warm, sunny place. 
  • Water daily, as needed, with the spray bottle.
  • Watch it grow!

In the picture on top, that was about a week's worth of growth. Depending on how high you want the grass to grow and when you're going to display your decorated eggs (a post on how to dye your eggs naturally and super-frugally is coming soon), you'll want to plan accordingly. You don't want to start too late and not have the grass for your display, but you don't want to start too early and have the grass all yellow and wilted by the time Easter rolls around. I just started soaking my wheat an hour ago.  Now if I could just think of a way to keep my cat from eating it once it starts growing...

Monday, March 15, 2010

Of Princesses, Frogs, and Really Delicious Pancakes

It should come as no surprise to anyone that knows me that I love cookbooks.  I have an entire shelf in my kitchen devoted to them, and even then, I have to store some in my pantry and cupboards for lack of room. Books are not one area where I'm parsimonious. I'm always getting something from Amazon. And there's just something about the possibilities within a cookbook that I can't get enough of. 

I've got the classic stand-bys, like the Betty Crocker cookbook . I have cookbooks geared toward kids and cooking.  I still love the cookbooks from our vegetarian days (vegetarian or no, I think everyone should check out Deborah Madison's Vegetarian Cooking for Everyone. Incredible.)  I've got my bandwagon cookbooks, ones I bought because I followed the herd (Example: I got both volumes of Julia Child's Mastering the Art of French Cooking just because of how hungry the movie Julie & Julia left me. BTW:  the beouf bourguinon recipe and the how-to on poaching eggs was worth the price of the first book alone!). While the bandwagon ones actually worked out, I've also got my impulse buys that weren't so hot. Never really did use that cookbook on making sushi...

 Then I've got my cookbooks that I use all the time and that I simply like to read. Enter the newest cookbook on my shelf that fits into that category, The Pioneer Woman Cooks by Ree Drummond.


I just discovered The Pioneer Woman and I just love her style!  Her recipes are just so down-to-earth and friendly - I'm convinced anyone could make them and have great results. I  must admit I was conflicted about getting the cookbook because all the recipes are on her site, but I bought it anyway.  Printed-off recipes just don't have the charm of a cookbook with splattered pages. 


I got the book almost a month ago for my birthday, but had yet to try any of recipes since my husband had been working crazy and late hours because of a deadline. Why go to all the trouble to make a dinner to just impress myself, right?  Especially when my toddler and I are totally fine with having spaghetti again.  Anyway, my husband's back to his usual hours, so I'm back to really cooking again and I celebrated by breaking out out the new cookbook.

I made the chicken spaghetti  the other night and I made her sour cream pancakes for breakfast yesterday morning.  The chicken spaghetti was really good, but the pancakes were ridiculous.  They're light and eggy and really different than my usual pancakes. And if you've read this blog for a while, you know that I love me a good pancake. Check out the PW cookbook - it's charming, approachable, and super-practical.  You'll find many recipes to fit into your frugal cooking repertoire, I'm sure!

Now onto the next matter of business....

I make no attempt to hide my nerdiness about certain things. Like Harry Potter.  Or Jane Austen. Or just about any period piece movie, for that matter (I'm currently obsessed with Masterpiece Theater's version of Jane Eyre).  Disney movies are yet another thing I'm completely, unabashedly nerdy about.  So, I thought I would mention an awesome link for a great deal on their newest release.


Lately, when Disney releases a new movie, they offer coupons on their website. Go to this link, click on the box next to The Princess and the Frog, and then print it.  It will get you $10 off the Blu-ray combo pack. If you don't have a Blu-ray player yet, don't worry!  The great thing about the combo pack is that it comes with a Blu-ray AND a DVD.  That way, people who plan to upgrade won't have to buy the movie twice. 

To get even more savings, buy the movie tomorrow when it comes out. Usually, place will sell new releases for less on just the release date.  For example, when Up came out a little while back, we printed off one of these $10 coupons and went to Wal-Mart to buy it. Just for that day, the Blu-ray combo back cost around $20 and then we used the coupon. So, we got the newest release on Blu-ray for only $10!  Now, I don't know how much stores will be selling it for tomorrow, but I just thought I'd mention it...

Friday, March 12, 2010

Homemade vs. Pre-Made: Chocolate Syrup

Like most toddlers -- who am kidding? I should say, like most people in general --- my little guy enjoys a glass of chocolate milk now and then.  I usually buy Ovaltine (just the regular chocolate kind, not the gross malt flavor) and make his chocolate milk out of that, but my grocery budget was tight this week and I didn't have the wiggle room to buy a $3 can of Ovaltine (something we like, but don't need). However, grocery budgeting is a difficult concept to explain to a three-year-old, so I decided to improvise with a recipe I've been meaning to try:  homemade chocolate sauce. 


I got this recipe from a great little cookbook called Cooking Fun: 121 Simple Recipes to Make with Kids. I love this cookbook because it is full of basics, plus I love the vintage design.  This recipe is so easy (it takes only five minutes) and I'm really pleased with the results.  Best of all, this recipe is crazy-cheap to make.

Plus, like I always mention in my 'Homemade vs. Pre-Made' posts, when you make things like this yourself, you avoid lots of 'fake food' (read In Defense of Food by Michael Pollan and you'll know what I mean. That book will change the way you think about food, I promise). For example, Hershey's Chocolate Syrup contains things (in addition to cocoa and sugar) like high fructose corn syrup, corn syrup (that's not an accidental repeat), potassium sorbate (a preservative), xanthan gum, polysorbate 60, and the ubiquitous ingredient called "artificial flavoring".  The recipe I'm going to share only has four ingredients, all of which I'm sure you have in your pantry right now. Now I know that choclate syrup, even if it's homemade, isn't health food, but I'd rather feed my family things I recognize and that are natural. Okay, I'm stepping off the soapbox....now.
.
Chocolate Sauce
from Cooking Fun: 121 Simple Recipes to Make with Kids
1 cup sugar
1 cup unsweetened cocoa powder
1 cup water
1 tsp. vanilla

Combine the sugar, cocoa, and water in a medium saucepan. Turn heat on low and cook for four minutes or until thick. Whisk occasionally to smooth out lumps. Let cool, then add vanilla. Stir well. Store in a glass jar with lid.  Refrigerate. This will keep for weeks.
----
The recipe says that this makes about a cup of sauce; as you can see below, I nearly filled a pint-size jar. 


To make chocolate milk, simply add one tablespoon of sauce to a cup of milk. Adjust this to your own taste, whether you want it more or less chocolatey. We also tested this further and heated it up (since the boy likes hot Ovaltine) - totally works.  I'm happy to say it passed the test when my son asked for Ovaltine.  He couldn't tell that I used something different - and if even if he could, it was quite obvious that he didn't care. Mission accomplished.

Monday, March 8, 2010

On Making Bread

So I'm standing at the bread section at Costco.  I take a good look around and pick up a loaf of wheat bread.  I slip it into the cart, acting as casually as one possibly can while shopping with a toddler.  Just as I'm about to saunter away from the bread aisle and down the next aisle to buy yet another 5-lb. bag of baking soda, someone jumps out from behind the corner, with an accusational finger outstretched.

"A-ha! Buying bread at the store?!" she says, shaking her head slowly, "And you call yourself the parsimonious princess..."

Oh, the shame.

Yeah, this didn't really happen. Part of me wishes it did, purely for comedic reasons.  In any case, I still feel like I'm copping out when I buy bread at the store.  I mean, when you think of frugal living, isn't making your own bread one of the first things that comes to mind?  And then there's those stories about mothers of ten children who made all their family's bread. Heck, my husband's aunts have like six children each and they all make homemade bread for their families.  Who knows, maybe they even grind the wheat. To be honest, I wouldn't be surprised; those women are incredible.

But I just don't do it.  I want to, really I do.  I'll purposefully not buy bread at the store, in hopes that it will motivate me to bake some bread. Instead, I'm feeding spoonfuls of peanut butter (aka 'He-Man suckers' - that's what my husband called peanut butter on a spoon when he was a kid. Awesome.) to my son or sending the hubby to work with yet another homemade frozen burrito because I don't have bread for sandwiches.  I just can't seem to work it into my routine. 

Here's the thing: I've come to the conclusion that even if something's frugal to make or do, if it just takes too much time it sometimes is just not worth it.  Time is money, after all. Plus, if it's not something that you enjoy, you won't stick to it. And that's the key to living frugally - there has to be an element of fun to it. I enjoy coming up with ideas and ways to save money;  I think it's fun to make food from scratch;  getting a really good deal on something can be exciting.  If frugality ever just feels like drudgery, then your methods or attitude need revamping.  As frugal guru Amy Dacyzyn said, "Frugality without creativity is deprivation."  There are just some things I'm not willing do, even to save a buck, because I either won't do them regularly (too much upkeep) or I will hate every minute of it. And if being frugal is just deprivation and drudgery, you'll never stick with it.


But I don't hate making bread. In fact, I think there's something so therapeutic about getting a few ingredients together, kneading it into a ball of dough, and turning it into 'the staff of life'.  And I honestly don't think anything tastes as good as warm, homemade bread.  So, I'm going to give making our family's bread a try again and make at least a loaf of it a week. BUT, if I don't stick with it and I buy bread at Costco again, I'm not going to beat myself up about it, either.

If you're going to give this whole bread-making thing a go (if you haven't already), I have a GREAT recipe that I used for my latest loaf.  It's from the cookbook Whole Grain Baking; the cookbook is written by the chefs at the King Arthur Flour Company, so I figure they know a thing or two about how to make a really great loaf of bread.  This recipe for wheat bread was so delicious - even though my son squished the loaf mere minutes before I put it in the oven, deflating it after all that rising time.  I was pretty angry, but baked it anyway.  Still really good. What I really like about this bread is it isn't heavy like lots of whole wheat breads, yet it still is close-grained and works great for sandwiches, hence the title...

100% Whole Wheat Sandwich Bread
from Whole Grain Baking

2 Tbsp. orange juice (according to the book, the juice "tempers the somewhat tannic flavor of whole wheat, without adding any orange flavor of its own".  If you don't want to use juice, substitute water. I used the orange juice.)
1 cup lukewarm water
4 Tbsp. (1/2 stick) unsalted butter, cut into 6 pieces
3 cups traditional whole wheat flour
3 tablespoons sugar
Heaping 1/2 cup of dried potato flakes or 3 Tbsp. potato flour (I used the potato flour. I found it at the natural/health food store in my neighborhood)
1/4 cup nonfat dry milk
1 1/4 tsp. salt
2 1/2 tsp. instant yeast (the book also says that you can use regular active dry yeast, but you need to make sure to dissolve it some of the liquid in the recipe before adding it to the dough)


Combine all the ingredients, and mix and knead them - by hand, mixer or bread machine - until you have a soft, smooth dough.  Cover and allow the dough to rise until it's puffy and nearly doubled in bulk, 1 to 2 hours.
 
Lightly grease an 8 1/2 x 4 1/2 loaf pan. Gently deflate the dough, and shape it into an 8-inch log. Place it in the prepared pan. Cover the loaf gently with lightly greased plastic wrap and allow it to rise till it's crowned about 1 1/2 inches over the rim of the pan, 1 1/4 to 2 1/2 hours.  Near the end of the bread's rising time, preheat the oven to 350 degrees.

Uncover and bake the bread for about 35 minutes, tenting it with foil after 15 minutes. The bread is done when it's golden brown and an instant-read thermometer inserted in the center registers 190 degrees (Heather's note: I tap the top of the bread and if it sounds a little hollow, then I know it's done). Remove it from the oven, and after a minute or so turn it out onto a rack. Brush with melted butter if desired; this will keep the crust soft. Cool the bread for 30 minutes before slicing. (Good luck with that last part - I cut it just a couple minutes after I took it out and it was AMAZING, even if it was squished. Look at the picture below, you can see the dent from his little hand.Grrrrr...)


So where do you stand on the bread-making spectrum?  Are you the exclusive baker of bread for your household?  Or are you on the other end and think it's just not practical (it does take a while, after all...) or worth the work? Or are you somewhere in-between like me?

Saturday, February 27, 2010

We've Only Just Begun: How to Wake Up Your Garden

Yes, that title should be sung. You can sing it a la Karen Carpenter, though I usually just remember the version from Happy Gilmore.  Just another attempt to make my life more like a musical....

Okay, on to the reason for the aforementioned title: For the last couple weeks ago, I've been sort of arguing with myself on whether or not it's too early to start doing posts on here about gardening. On one hand, a good part of the country is still buried under lots of snow (though, not so much here, oddly enough, where we boast about having 'the greatest snow on Earth'.  Go figure.).  Then again, there's this weekly gardening call-in show on the radio every Saturday and they still talk about gardening during the winter months.  Anyway, I've finally come to the conclusion that it is, indeed, time for the gardening posts.  Being the enthusiastic gardening aficionada that I am, I'm pretty excited to get started. We've only just begun...


A few things brought me to this conclusion. One thing is that the first of my tulips are peeking out from my flower bed. Everyone should plant bulbs - whether in flowerbeds or in containers - purely for the psychological benefit.  It's a well-known fact that more people are depressed during the winter months; bulbs are good for the mind because they're a physical reassurance that winter will, in fact, end and that warm weather is in the near future.  I've given this much thought, as you can tell.


The second thing: my pussywillow. It's so close to blooming with those soft, white buds. Again, if you have a yard, you should plant these purely for the same reasons I suggest planting bulbs.  It just does something to your soul to see life emerge from the cold, dingy brownness that is Februrary.

And finally, the thing that really got me to start posting gardening stuff again was that the gardening workshops in my area have started again.  Hey, if they're ready to go, why not me and this blog?  It just so happens that I attended the first workshop of 2010, so I'm going to share the handout from the class I attended called,

"Wake Up Your Garden!"

First of all, I don't want anyone feeling left out if you don't have a yard or garden area. That goes for people that profess to have a 'black thumb', too.  I promise, I will help you the best I can through your gardening endeavors as the season progresses and give you ideas on how to adapt to your situations. It's a tall order, I know, but I will do that for you (are you feeling the love?). This post is just a quick overview - a sort of check-list - of how to get ready for the season ahead; more in-depth info, how-to, and details to come in the weeks ahead.

Step #1: Planning and Preparation
  • Make a plan of your garden site, including space and sun exposure. Graph paper is great for planning your garden area.  If you already have a garden, start planning what you want to grow over the course of the year. Consider what worked for you last year and what didn't.  If you don't have a yard or have a very small one, start thinking about alternative ways to garden: is there room somewhere on a patio or balcony for some containers? If so, think about what you would like to grow (peas? tomatoes? herbs?) - I had a lot of success with container gardening last year. 
  • Select plants that grow well in your locality and planting zone. Your planting zone is an excellent guide in knowing what will grow (and what won't) in your part of the country.  If you don't know what zone you live in, go to this link to the National Gardening Association and enter your zip code. It will not only tell you what zone you live in, but the site has lots of great information and resources.
  • Order from seed catalogs if local nurseries don't carry what you need.  Here's a site I found about some of the best seed catalogs out there. Just about every company I know of will send you a free catalog.
  • Clean and sharpen your garden tools. If you don't have any, go get the basics. You can find a good list of what to get here.
 Step #2: Clean Up
  • Rake up leaves and dead grass. Clear out annual and perennial tops.
  • Inspect non-plant items like pots, grow boxes, trellises, fences, sprinklers; repair or replace as needed.
Step #3: Improve Soil
  • Organic matter should be added every year, dug in or as mulch on top. 
  • Don't work the soil until it is dry enough. One way to tell:  grab a handful of soil and make a ball. If it breaks apart when it hits the ground, it is dry enough; if it falls to the ground with a thud, it's still too wet. You don't want to use too-wet soil because it will be too compact for the air and nutrients to get to your plants, plus it will make your seeds rot.
  • Aerate lawn (if applicable).  Core aeration is most effective. Do it in the spring OR fall. 
  • Fertilize.  Lawns need high nitrogen (N); pre-emergent is useful in early spring.  Fertilize bulbs after they bloom; fertilize perennials when 2-3 inches tall.
Step #4: Bug and Weed Control
  • Clean up of dead material (i.e. leaves, perennial and annual tops, etc.) will help keep pests under control.
  • Annual weeds - hoe when small. Pre-emergent herbicides are effective.
  • Perennial weed - pull the entire root! Most susceptible to herbicides when young.
Step #5: Pruning
  • Pruning stimulates growth and determines the shape of the plant. Prune after coldest part of winter is past. 
  • Prune shade and ornamental trees very little - only diseased and broken branches.
  • Prune fruit trees according to type, leaving strongest branch angles. (Pruning fruit trees is important, but tricky. Do your research or take a class first. I'm taking a class next month - I'll share the info with you.)
  • Roses should be shaped and thinned, with all dead material removed. Leave 3-5 sturdy canes.
  • Cut off tops of perennial ornamental grasses.
  • Prune spring flowering shrubs (like lilac and forsythia) after they're done blooming.
Step #6: Planting
  • Start seeds for transplant, counting back from outside planting time. (More on seed starting in posts to come)
  • Plant cool season vegetables mid-March to early April:  broccoli, peas, onions, cabbage, lettuce, spinach, potatoes
  • Plant cool season annuals in early April: pansies, primrose, stock
  • Plant bare-root trees, shrubs, roses, raspberries, blackberries, and strawberries in mid-March or early April.
  • You can get an early start on lots of vegetables and fruit by warming the soil with plastic mulch, wall-o-water, and/or cold frame.
    Okay, so that's a lot of information. It can seem a little overwhelming, I know. I keep looking at my yard and I can't help but think of all the work ahead of me. Everything, like my grouchy flowerbed toad, seems to be buried in leaves or dead flowers. But it's so rewarding to grow your own food (not to mention a frugal thing to do!) and it's a lot of fun to beautify your home with various plants and flowers.

     One other thing:  I would LOVE any feedback, at any time, with gardening questions - general or specific. You can leave your question or concern in a comment or email me (my address is on my profile). I'm no expert, but I feel like I'm a pretty competent gardener. And if I can't answer a question, my mom is a certified Master Gardener and knows even more than I do. Plus, I go to lots of classes and workshops, so there are plenty of super-smart people I can ask.  So, send me your concerns and questions. I'll do the best I can.  One stipulation: don't ask me anything about lawn care. My lawn is the bane of my existence (well, that and shopping for pants). No matter what I do, it always gets brown and weedy in patches. But anything else, I'm all ears...

    Thursday, February 25, 2010

    Your Salad Will Thank Me: How to Make Homemade Croutons

    Back at the tender age of 15, I worked at a local restaurant. It was a small place, owned by a married couple, where the husband was the cook (a fabulous cook, I might add) and the wife managed everything else. I mostly did odd jobs there. Washed dishes sometimes, did food prep other times, all while helping the waitresses with their orders. It was a great job - not only did I make a little extra money, but the owners always fed me an amazing dinner when I worked and let me do my homework when it was slow.

    Part of the reason that place's food was so great was that just about everything was made from scratch. I remember looking through the recipe books and mixing up huge batches of salad dressings, scooping butter into what must have been at least fifty little serving dishes, cutting up tons of lettuce for an entire dinner shift's worth of salad, and a myriad of other things.  But one thing in particular that I learned to do while working at this place was how to make homemade croutons.

    Making croutons is a ridiculously easy thing to do and it takes hardly any time to make them.  I remember making all the croutons for the shift I was working in less than a half hour.  Seriously, it's that easy.  And best of all - it's a great money-saver. Not only do you save money by making your own (buying a box at the store that can cost anywhere from $2-4), but it's a great way to use up stale or dried out bread.  AND, like I always say, making things yourself is a great way to go because you control what goes into your food. Sure, white bread coated with butter and garlic salt isn't necessarily health food, but it is better than the store-bought kind that contain delicious ingredients like high fructose corn syrup, partially hydrogenated soybean and cottonseed oil, and MSG.  

    So, to make croutons, you need some kind of bread. Obviously. Now, the very best kind for croutons (what I used at the restaurant) was French bread. But you can use any other kind of bread - my mom uses hamburger and hot dog buns that have gone stale.  Cut up the bread into squares - whatever size you want your croutons to be.  Spread them out on a baking sheet, either coated with cooking spray or lined with parchment (or better yet, a Silpat. Seriously, if you bake a lot, you really should invest in one of these. I love mine.).  Next, melt some butter and pour it all over the squares - I used a little over a stick of it.  Ahhhh....butter.  Makes just about anything better, don't you think?

     
    Quick sidenote:  as you're cutting up your bread for the croutons, don't forget to save the crumbs. Great for breading just about anything you could ever want to bread. No sense in buying crumbs at the store when you've got all of these, right?

    Next, sprinkle the buttered bread squares with garlic salt and any other seasonings you'd like.  My mom likes the Mrs. Dash Italian Medley; I just used plain ol' generic Italian seasoning.  They taste good even at this step - we all kept snacking on them, as you can see.  But they get even better once they've been toasted in the oven. Oh, I probably should have mentioned this earlier, preheat your oven to 350 degrees.
     
    Bake the croutons for about 10-15 minutes, checking regularly so they don't burn (been there, done that).  You want them to be crunchy and golden-brown. Once they've cooled, store them in a bag and you're set.  Delicious, homemade croutons for hardly any money.  This batch cost me under $2 to make - and it made a lot.  Plus, did I mention that they taste waaaaay better than the ones at the store? Oh yeah, I did.
     
     It just so happens that my son loves salad, particularly Caesar salad.  So, I threw together some romaine lettuce, shredded Parmesan cheese, Caesar dressing, and, of course, lots of croutons. And for the record, he ate the entire bowl of it.
    Related Posts with Thumbnails