Thursday, July 25, 2013

More Good, Cultured Fun :: Making Frozen and Greek Yogurt

Have you tried making your own yogurt yet? See, I told you it was easy!

Without question, I prefer Greek yogurt over regular. I remember the first time I ever tried Greek yogurt (mmmm....Chobani pineapple. Yum.), I was surprised how it tasted more like a dessert than the yogurt I was used to. Since that first taste, I haven't been able to eat regular yogurt; it just seems too watery. This kept me from making my own yogurt for a while -- I wasn't ready to give up my Chobani yogurt. Turns out, making your yogurt Greek is simple. The difference between regular yogurt and Greek is that the Greek yogurt has been strained, removing the whey, hence the creamier texture.

To Greek-ify your yogurt, you'll need:
  • fresh homemade yogurt
  • a large bowl
  • a colander/strainer that's smaller than the aforementioned bowl
  • thin cloth (more on that in a bit)

Line the colander/strainer with the thin cloth. This can be from a variety of sources. I ran out of cheesecloth (which wasn't working that well anyway since I'd bought cheap grocery store kind that doesn't have a very fine weave), so I improvised with some my cloth napkins that are made out of birdseye cotton (it's the same kind of cloth used for diapers. I got my cloth napkins from Etsy -- I love them.), with the cheesecloth I had left layered on top of that. They worked even better than the layers of cheesecloth I'd used before (plus cheesecloth can get kind of pricey). You could use a thin tea towel or some muslin cloth, too. I've also read about people using paper towel and paper coffee filters. Personally, I like the idea using cloth over paper since it's reusable, but work with what you've got. 


Put the strainer over the large bowl and then pour your yogurt into the cloth (or whatever you choose to use). Fold the edges of the cloth over the yogurt and put it (the whole shebang: bowl, strainer, yogurt, etc) into the fridge for 1-2 hours. Really, you can let it strain as long or short as you want, until it gets to the consistency you like.


I strained mine for a couple hours and it got to that consistency I love. It's not the best picture, but if you look closely, you can see where I got my fingerful of yogurt in the lower-right corner. Totally strained and creamy. Yum!


Once you've strained your yogurt, you'll see that there's liquid collected in the bowl under the strainer. Whatever you do, don't throw that out!! That clear, yellowish liquid is the whey and it's actually quite useful and really good for you. For a great post about whey and how to use it (she has 16 different uses for it!), check out this link


If you're not going to use your whey in a couple days or so, you can freeze it for later. I freeze mine in jars. My boys' pediatrician (remember, the guy who finally convinced me to give this yogurt making a go) said he freezes whey in an ice cube tray (yet another use for them -- what a useful kitchen tool!) and then will pop a couple cubes into the smoothies he makes (since whey is full of protein and vitamins).  

The only downside to making your yogurt Greek: it does cut your yield down. Because of the straining, you'll end up with less yogurt than you started with (obviously) -- how much less depends on how much you strain it.

Want to make your homemade Greek yogurt even more delicious? Make frozen yogurt!

My husband has been on a certain kick lately: he loves plain, tangy frozen yogurt. You know, the kind at those places where it's self-serve and you can load it with toppings. Knowing this, I thought it'd be fun to try to use my newfound yogurt-making skill to make one of his favorite treats.

Time to pull out the ol' ice cream maker attachment for my Kitchen-Aid. 

I got the ice cream attachment a few years ago for Christmas from my husband. Really, it's the gift that keeps on giving. Throw some cream, and some sugar into that bowl (after the bowl has been chilled in the freezer for several hours) and you've got ice cream that makes the store-bought stuff taste like...well...a sorry excuse for ice cream.  

I'd never made frozen yogurt before but I figured it couldn't be much different than making ice cream. It wasn't.

Even so, I wanted to use a recipe as my guide and I thought this one sounded the best, just what I'd been looking for in recreating my husband's favorite kind. (Note: it works with any kind of ice cream maker.)


You simply mix the yogurt with some sugar and stick it in the fridge for an hour. I used less sugar in my version than was called for in the recipe because we still wanted the tangy flavor of the yogurt to come out. 


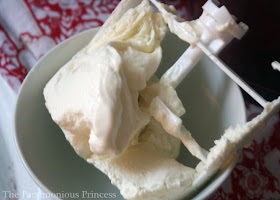
Once it chilled in the fridge, I poured it into the already-started machine and let it the Kitchen-Aid work its magic.


I was going to dish up the frozen yogurt into a cute little bowl with a pretty placemat underneath, with some of the raspberries from my yard (yay!) daintily placed on top. Nope. It didn't make it that far. No way were were going to risk that stuff melting while I tried to style it just-so and get a un-blurry photo. Basically, I split it between the hubs and I in a couple oversized mugs, gave the obligatory offer to the boys (they didn't want any -- hooray!), tossed some of the raspberries on it, and stuck a couple spoons in each mug. Nothing fancy here.

But the taste. Oh my goodness. I'm not exaggerating at all when I say it was one of the most delicious things I've eaten lately. It was divine. You owe it to yourself to make this homemade frozen yogurt. It may be one of my favorite homemade vs. pre-made accomplishments yet.

Note: Some of the links in the post above are "affiliate links." This means if you click on the link and purchase the item, I will receive an affiliate commission. Regardless, I only recommend products or services I use personally and believe will add value to my readers. 

{This post is linked up to Frugal Days, Sustainable WaysHomestead Barn Hop, Simple Lives ThursdayFrom the Farm Blog Hopand Little House Friday DIY Linky.}

Wednesday, July 24, 2013

Good, Cultured Fun :: How to Make Homemade Yogurt


My kids have the best pediatrician, who my family affectionately refers to as Dr. Pete. My boys actually look forward to visits with him. He has nicknames for them, tickles them, gives hugs, and makes jokes about farting and poo (aka, boy humor). I think he's the best because he really knows his stuff and never hesitates to thoroughly answer any and all of my questions (no matter how dumb they may sound to him). Another thing that makes him super cool: we feel pretty similar when it comes to food. A couple visits ago, we chatted about The Omnivore's Dilemma and how much better a fresh egg tastes than its grocery store counterpart. It was pretty great.

A couple weeks ago, I thought my six-year-old had strep throat again, so we paid a visit to Dr. Pete. When he came to tell us the test was negative (hooray!) and as he examined both boys (because they'd had the same virus, it turned out), we got on the topic of food again. That's when he asked if I'd ever made yogurt. I told him no, that I'd wanted to for a while but that it'd always seemed tricky. He proceeded to tell me how easy it is to make. I was convinced. That same day, I went to the store, picked up the ingredients, and made my first batch of yogurt.

He wasn't kidding: homemade yogurt is so easy to make! Not only is it really easy to make your own yogurt, it's also much cheaper! To make a quart of yogurt (and this is with organic milk, which can cost a bit more), it only cost around $1.50.


To make yogurt, you'll need the following:
  • 4 cups of milk, any fat percentage -- I used whole milk (Do NOT use milk that has been ultra-pasteurized. Ultra-pasteurized milk has been heated to a higher temperature than pasteurized milk, so it doesn't respond to the cultures.)
  • 3 Tablespoons plain yogurt with live, active cultures (You only have to use store-bought yogurt for the first time you make it. Once you've made your own yogurt, you can just use three tablespoons of it for your next batch.)
  • two dish towels
  • a food thermometer
  • a slow cooker
There are a variety of ways to make and incubate yogurt, but this is the way Dr. Pete told me to do it...


Plug your slow cooker in and set it to 'warm' or to its lowest setting.  Put one of the dish towels inside and put the lid on the slow cooker.


Pour the milk into a medium saucepan and heat it over medium heat, stirring often so it doesn't scald.


Heat the milk until it gets to 180°F. This takes about 15-20 minutes.  (Please ignore my not-hand-model hands, especially the dirty thumbnail. I swear they were clean but that dirt from the camping trip the day before was stubborn!)

Remove the pot from the heat. Wait for it to cool to 110°F. This is the longest part of the process. You can let it cool at room temperature (which is what I've done), but I read recently that you can also put the pot into a larger bowl or sink with ice water.


While was I waiting for this batch to cool, I flipped through Home Dairy with Ashley English. I'm telling you, there's something super-empowering about making your own dairy products. I can't quite explain why, but it is. So far, I've made butter, mozzarella cheese, and yogurt. I can't wait to try making feta, cream cheese, and kefir next, among a bunch of other things.  If you're interested in making your own dairy and feeling all cool and self-sufficient, Home Dairy is a wonderful resource for making a wide range of dairy products; another great book with fantastic beginner dairy recipes is one of my favorite cookbooks, The Homemade Pantry by Alana Chernila.


Once the milk has cooled to 110°F, mix in the three tablespoons of yogurt with a metal spoon. 


Pour the milk-yogurt mixture into a quart-size Mason jar. Place the lid on top and screw the ring on tightly.


Wrap the jar in the other dish towel (it's like insulation) and put it into the slow cooker. It looks like you're putting a baby to bed. Unplug the slow cooker and put the lid on it. Leave the jar in the slow cooker for six hours (or overnight) and let the cultures work their magic.


It's cool that your yogurt starts so liquidy but then within a few hours...


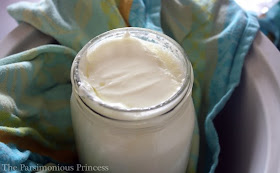
...it turns into yogurt -- fresh, tangy, delicious yogurt!

Before serving, let the yogurt chill in the fridge for an hour or two. It's a good idea to set three tablespoons aside in a little jar or other container for your next batch of yogurt (I had to buy another cup of yogurt since we ate ours up without thinking ahead).  This yogurt will keep in the fridge for about 2 weeks -- the longer it's in the fridge, the more tangy it'll get.

Serve this with some fresh fruit, granola, or sweetened with honey or syrup.

Note: Some of the links in the post above are "affiliate links." This means if you click on the link and purchase the item, I will receive an affiliate commission. Regardless, I only recommend products or services I use personally and believe will add value to my readers. 

{This post is linked up to Frugal Days, Sustainable WaysHomestead Barn Hop, Simple Lives Thursday, From the Farm Blog Hopand Little House Friday DIY Linky.}

Friday, July 19, 2013

Lovely Links : Going Camping Edition

(source)
It's that time of year, folks! Few things say summertime to me more than a good, old-fashioned camping trip. We've gone once already this summer and have a couple more on our calendar before the summer is through. I'm no rough-and-tough, super-outdoorsy granola girl, but one of my favorite things is waking up in a tent -- hearing the birds chirp outside, the breeze rustling through the trees overhead, the cool air waking you up. Makes a person feel alive, you know?

If you've got a camping trip on the horizon, there are tons of great resources online -- packing lists, recipes, tips, crafts, games, homemade bug repellents, the list goes on and on. People are just so clever! So, in honor of camping season, I thought I'd share some cool camping links I've found (and, in many cases, used).

I can smell that fresh mountain air already...

Let's Go Camping! 50 Ideas to Make it Easier (and more fun!) :: A Mom with a Lesson Plan
So many good ideas here. May I recommend the suggestions for Rolo marshmallows and the hobo eclairs? We made those on our last camping trip (thanks to this list) and they were awesome.

Books to Read on a Camp-Out :: KC EDventures
Reading a book outside is one of my all-time favorite things to do. Get the kids in on the action and bring some camping and outdoors-themed books for them. It's a nice way to keep kids occupied. During our camping trip last month, I read We're Going on a Bear Hunt at least twenty times (and that's on the conservative side -- he couldn't get enough of it!). This link has a lot good recommendations for a variety of ages and reading abilities.

Tacos in a Bag :: Camping with Gus
We made these on our last camping trip and they were great! Seriously easy to make and so little mess (especially since I cooked the ground beef at home and then just reheated it at camp).  This is definitely going to be in our camping food repertoire for years to come.

Family Camping Checklist :: The Portable Baby Blog
What to Bring When Camping with Children :: Snail Pace Transformations
In the past, we've always gone camping with either my husband's or my family (parents, siblings, and lots of nieces and nephews). It's been easy that way in the sense that Kevin's mom and my mom have been the major planners and packers, the sort of overseeing matriarchs of their respective family camping trips. They've have plenty of experience in organizing these types of things. A couple weeks ago, we went on a camp-out with just our little family of four, making me the said planner, packer, and overseeing matriarch. It's a lot of work! Inexperienced at this role as I was, I forgot a bunch of stuff. Sigh. Next time I'm printing off a list. The first link is a really comprehensive list; the second link is a great outline to help you get organized. Lesson learned.

How to Survive the Weekend Camping With a Toddler :: One Sweet Appetite
This is me this summer. Camping with little kids is fun, but it can also be a bit challenging. Lots of great ideas and reminders here for kids of all ages.

41 Camping Hacks That Are Borderline Genius :: Buzzfeed
These hacks are pretty dang awesome. Except that one for glow-in-the-dark Mt. Dew. I tried that this past camping trip and it didn't work at all. I'm totally trying that one using Doritos as campfire kindling next time we go, though.

Happy camping this summer, everyone!

Monday, July 15, 2013

Peeeaaaanut, Peanut Butter :: How I Ditched the Jar of Skippy and Started Making My Own Peanut Butter

First, you get the peanuts and you crush 'em, you crush 'em...

Just kidding. That's not how this blog post is going to go down. {If you want to sing the song, feel free to click here. Oooh! Even better, if you want to relive your childhood, you can watch this vintage Sesame Street film of a peanut butter factory! It's two minutes well spent. I'll wait.}

I'm totally into buying natural foods, but I've never been able to really bring myself to switch to the healthy peanut butter. You know, the kind that has all the oil on top, the kind that you have stir before using it. Whenever I tried it, I just..well...wasn't a fan. Even when I did start buying natural and organic food, I still bought my family's peanut butter at the regular grocery store. I figured if I bought the Skippy Natural kind (so it didn't have hydrogenated oils and stuff), we'd be good.

A couple months ago, I learned that peanuts are sprayed heavily with pesticides -- a problem since the shells of peanuts are porous, so the pesticides can get right down to the meat of the peanut. The pesticides that are used are carcinogenic, not to mention containing neurotoxins and hormone disruptors. On top of that, there are developmental and reproductive effects from these pesticides -- this concerned me most because of how much peanut butter my boys eat (seriously, both of my boys have been known to eat all the peanut butter off bread and ask for a second slathering). Peanuts are also prone to mold and when peanut butter is mass-produced, quite often the yucky ones get thrown into the mix. Remember all the peanut butter recalls we've seen in past years? It felt dumb for me to buy all this organic produce, meat, and dairy but hold out on the organic peanut butter.

Well, now that I've made you paranoid like I was, I have a solution: make your peanut butter from scratch! Not only is it suuuuper easy but it tastes delicious. It's not exactly the same taste or consistency as the jar of Skippy (mmmm...that's stuff's good for peanut butter on a spoon, which my husband, incidentally (and adorably), used to call "He-Man suckers" when he was a kid), but it's good in a different way. I love it. My kids love it. My often-skeptical-about-natural-foods husband likes it. I feel good about serving it to my family because it's healthier and I know exactly what's in it. And it's pretty inexpensive to make. It's a win-win-win-win-win situation, really.  P.S.- you can use the same method and recipe for other nut butters. Almond butter, anyone? Yum!

(Also, I have to give this blog a shout-out. I've read countless recipes for homemade nut butters -- they're all pretty much the same -- but this post was the one that finally made me do it. Credit where it's due, as always)

On to the recipe!


Homemade Peanut Butter

3 cups of roasted peanuts (I bought mine organic in the bulk section for $2.99/lb.)
1 Tablespoon of honey
1/2 teaspoon salt (I like Redmond Real Salt)


Pour all of the peanuts into the bowl of a food processor.


Turn it on and let it run for about 6-8 minutes, depending on how smooth you want yours to be.

It'll seem like it's taking a while and that it's not working out.  At one point, it'll look all dry and grainy like this:


And then it'll look all clumpy like this:


Trust me, though -- it works out in the end.


Ta-da! Peanut butter! I like mine a little rough -- not super creamy but not full of chunks either. It has a sort of grit to it that the husband and I particularly like. Run your food processor as much or little as you like until you see a consistency you want.


Add the honey and salt. Turn the processor on for about 30 seconds.


In less than ten minutes, you've got your own homemade jar of peanut butter. I keep ours in the fridge in a pint-sized Mason jar.  What's nice about this peanut butter is that it's completely natural (none of that hydrogenated garbage), organic if you want it to be, and, unlike store-bought natural peanut butter, you don't have to stir it because the oils don't separate. The flavor of this peanut butter is so good -- the way the peanuts and honey mix, along with the hint of saltiness, is really great. I don't see us going back to the store-bought variety anytime soon. Sorry, Skippy.

Note: Some of the links in the post above are "affiliate links." This means if you click on the link and purchase the item, I will receive an affiliate commission. Regardless, I only recommend products or services I use personally and believe will add value to my readers. 

{This post is linked up to Homestead Barn Hop, Simple Lives Thursday, Little House Friday DIY Linky, Creative Home & Garden Hopand Frugal Days, Sustainable Ways.}

Tuesday, July 9, 2013

Avoiding Baked Chickens :: How We Keep the Ladies Cool in Summertime Heat

Like many of the states in the western U.S., we went through an intense heat wave a little over a week ago at our house. The temperatures were easily over 100° F for days. Ugh. We avoided a good portion of the heat wave by camping in the mountains and then the rest of it by staying inside our air-conditioned home. Unfortunately, our chickens couldn't enjoy the cool comfort inside our house; they were stuck outside in the 100°+ heat. As a result, we (along with one of my favorite girls in the neighborhood -- she took care of them while we were camping) employed a variety of methods to keep them cool in the blistering heat.

In many ways, summer is a lot harder on chickens than winter. Chickens can endure temperatures as low at -20°F.  High temperatures stress chickens' bodies out much more than cold ones. Chickens don't sweat; they release heat through their combs and wattles. This can be a problem because more blood goes to their combs and wattles, resulting in less blood to vital organs and extra stress to their systems. Chickens also pant to release heat. However, panting can put extra stress on their hearts and respiratory systems and it can lead to dangerous condition called acidosis. (I learned all of this from this awesome chicken blog)  Basically, the heat is really hard on chickens and they need extra help when it's hot.

Here are a few ways we keep the ladies in the backyard cool throughout the summer months...

1. Plenty of drinking water, often with added electrolytes.

The first rule we hear whenever there is hot weather is to drink plenty of water. A lack of water leads to all sorts of problems, whether you're a person or a chicken. Sometimes when your body is extra depleted, electrolytes are needed.


For my chickens, I mix up a gallon of water with a 1/4 tsp of an electrolyte mix I got at my local feed store. I keep the jug of water in the fridge (hence the labeling so no one drinks it, thinking it's lemonade or something. My two-year-old even knows now that it's, as he calls it, "chicken juice").  I didn't know at the time when I bought the electrolyte mix (which I bought last summer), but you can make your own electrolyte mix from scratch (recipe here from that aforementioned awesome blog). Now that I think about it, you could probably even use my recipe for homemade Pedialyte (sans Jell-O powder), too.

2. Shade 

Since we have a chicken tractor, we have the luxury of moving the tractor anywhere in the yard. Unfortunately, we only have one corner where they could go that's fairly shady all day. We do keep them in some areas where they're shaded for a portion of the day, but it's close to impossible to keep them in the shade all the time.

If shade for your chickens is limited you can employ my method: toss a towel, sheet, or light blanket over their run.

As you can see in the picture at the left, my method actually does a pretty good job keeping the bright sun out of there. The girls will usually huddle in the shaded part or in the hen house on particularly hot days.

Shade is a no-brainer, up there with plenty of water. Whether you have plenty of trees or you have to improvise with some kind of cover, give those ladies some shade!


3.  Wet Fabric + Breeze = Old-Fashioned Air Conditioning

I can't quite remember where I read this years ago, but I learned that back in the pre-A/C days, park rangers in Death Valley used to hang wet towels and sheets in front of open windows in the ranger station. When any sort of breeze or wind came through the window, it would pass through the wet sheets/towels and cool the air. Remembering this, whenever the girls seem particularly hot, I'll soak the old throw-blanket I use for their shade with water from the hose and then drape it over their run.


4.  Ice, ice, and more ice. 


If I ever notice that my hens are panting, I immediately get some ice and dump it in the tractor. This cools them off quickly. They love standing on it and, as you can see in the picture above, eating it. I've also made ice cubes with mint (mint is naturally cooling) in them and they seemed to like that, too. (Makes having mint growing rampant in my flowerbed slightly less irritating. Grrr.).

Another way to use ice to keep chickens cool is to freeze bottles of water and then set them in the run with the chickens. We had our chicken-sitter do this for us while we were away camping -- before we left, I gave her a couple washed-out juice bottles full of water to keep in the freezer (since they had the extra freezer space). As the ice in the bottle melts, it cools the area around it. The chickens also like standing by it and sitting on it to keep cool.

5. Cold and/or Frozen Treats 

In addition to ice, I'll often give my chickens a handful of frozen vegetables from my freezer. Sometimes, I'll give them a little cold yogurt (I don't do this often since chickens don't really digest dairy -- but let me tell you, they LOVE the stuff). Watermelon is a great summertime treat for chickens, too. My chickens' favorite cold treat:


Frozen shredded zucchini. I have some left in my freezer from last year's zucchini harvest. Once in a while, I'll unwrap a cup-sized block of frozen zucchini and put it in their run...


...and they go nuts (as shown by the blurred chicken heads).  They love it!

6. When all else fails, use the hose.

Sometimes, after all I've done, they'll still be panting. One sure-fire way to cool them down -- spray the run and even the chickens with the hose. They don't necessarily love it but it does the trick.  Last week it was kind of funny -- the chickens were looking totally miserable, so I got the hose out (despite our city's water restrictions about using culinary water outside) to spray the grass in the run and the ladies themselves. Two of them predictably flapped, ran, and squawked as I sprayed in there; however, my Rhode Island Red, Princess Leia (pictured on the left below), simply stood in one place and enjoyed herself. Seriously. I could tell she was digging it, like she was thinking, "Ahhhh....that's the stuff."

The water cooled them right down, plus the wet grass kept their feet nice and cool (which helps keep the rest of their body cool as well). Plus, it's good for a laugh -- the girls look pretty funny when they're wet.

"Oh, the indignity!"

How do you keep your chickens cool in the summertime?

{This post is linked up to Homestead Barn HopCreative HomeAcre Hop, Simple Lives Thursday, Little House Friday, From the Farm Blog Hopand Frugal Days, Sustainable Ways.}