My kitchen table is often covered in a myriad of things: mail, magazines, notebooks, coloring books, receipts. In other words, clutter. I don't mean for this to happen, but I'll just toss something on the table, intending to get to it and put it in its place, but then I get distracted. Pretty soon, the clutter overtakes the table. It's not a big table -- just a round glass one -- but it's still too much clutter. When dinner rolls around, I'm either putting the clutter on empty chairs or on the floor (I'd put it on the counter, but it's covered with the remains of the dinner prep). Sometimes, I'll just see it and decide we'll eat in the family room that night. Definitely not the ideal. And then there's the other things that get in the way of our family dinnertime. Late hours at work. A toddler who doesn't like what I've made. A new episode of Lost. Again, not the ideal, but it's reality sometimes, as ashamed as I am to admit.
A week ago, I came across this post on SouleMama about how her family does dinner every night. No matter what they eat, whether it's a made-from-scratch dinner or a box of pizza, they always eat at the table and use the time to not only eat, but to reconnect. I read that post and I was inspired. If I was going to go to the trouble to make dinner, shouldn't my table be inviting? Shouldn't I strive to have my little family gathered around it every night? Since I've read that post, I've had other moments of insight on this topic and decided to make a goal to have my table always clear and ready for meals. I've been doing pretty well for the last few days, I'm proud to report.
But what does this have to do with frugality, you ask? Not only did the post on SouleMama make me want to make family dinner a special time, but I was also inspired by the placemats she made for her family. My current placemats were looking quite worn and faded. Not so appealing - they had become almost utilitarian instead of decorative. So, I decided (as I have before) to try to be like SouleMama (Did I mention she's the author of Handmade Home
I had no book or guide on how to do this, but I figured it couldn't be hard to figure out. It wasn't. At all.
I bought a couple yards of fabric (one yard for each print) at Ikea for a total of about $14, which made six placemats. Their fabric is a little more pricey than what you'd buy at a place like JoAnn's, but I love Ikea fabric because it's not only kind of funky, but it's also fairly heavy material. And even though it was a little more expensive than other material I could have gotten, I rationalized that it's still cheaper than buying a set of placemats that I'd buy at other home decor stores that I've shopped at. Most can cost anywhere from $3-8 a mat; I made mine for just a little over $2 each. Okay, moving on to the instructions...
To determine the size I wanted to make my placemats, I used the other store-bought ones I had as a gauge. I eventually settled on making my placemats 17" x 14". So, I set off to cutting up all my fabric into rectangles to fit those dimensions. In my opinion, the worst part of sewing anything is cutting the material. I get so paranoid about cutting it wrong that it takes me forever. I mention this because cutting up the fabric is the hardest part. Once you've got your material cut, the rest is a breeze.
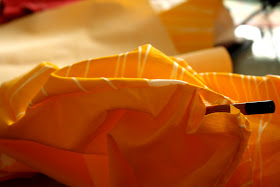
Next, pin two pieces of the cut fabric together with the right sides facing in.
Once you've got all your fabric coupled and pinned together, you're ready to start sewing!
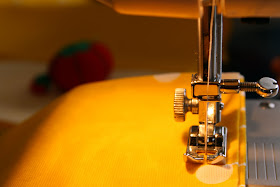
Sew all around the edges, about 1/4" in. Stop sewing a few inches short of where you started. You'll need a gap in the corner big enough for you to turn the placemat right-side out. I realize now that my staged picture of this step is totally inaccurate - according to this photo, I'm going to be stitching a couple inches in and right over a pin. Don't do that.
Turn the placemat right-side out. I use a chopstick to help me push the corners out all the way.
Once you've got it all turned, press. Good ol' trusty iron. Got it ten years ago when I moved away to college. Still works as good as new. Just thought I'd share that little aside.
Once it's pressed, stitch around the edge again, about 1/4" in. As you do this, you'll sew up the gap you used for turning. I'd suggest using some kind of fabric glue or adhesive if you want to really close up the seam at the gap so it matches the rest of the edges on the mat.
That's it. My first freestyle sewing project - and it actually worked!
So, even though we woke up to snow for our Easter morning yesterday, at least my (clutter-free) table will feel spring-like...


Breakfast and lunch at the bar . . . dinner is at the table. I am often having to repeat to my children (and I hope they quote me when I'm dead) "Dinner is not just about the food!"
ReplyDeleteMy children have to stay at the table until 3 people are done (mostly because it is so long before the 2 year old is finally done!!) So 3/4 people have to be done and if dad is home (but he leaves for work at 5) it has to be 3 out of 5 done before they can get down.
Also, every night as I am making dinner, it becomes a family chore to clear the table and help set it. This is extra together time that we take advantage of.
We use glass plates for dinner (unlike lunch, when we use plastic or casual ware . . . okay, or just a paper towl!).
Some day I hope and pray it made a difference in my family!
Love it! Again you are an inspiration! We always eat at the table but my table is just a oval wood table-needs a little pep! I can't sew, so maybe I will be buying some placemats.
ReplyDeleteI LOVE THOSE!
ReplyDelete